Problem: Connecting wire rope to a turnbuckle can seem tricky. Agitate: A wrong connection might lead to failure and safety risks. Solution: I’ll show you the right way.
You attach wire rope to a turnbuckle using specific end fittings like thimbles, swage sleeves, or wire rope clips, ensuring secure and adjustable tension.
Transition paragraph: I remember a time when a small error in rigging caused a big headache on a job site. That experience taught me the absolute importance of proper connections. Let me share how to get it right, every single time.
What Wire Rope End Fittings Do You Need for a Turnbuckle?
Choosing the right end fitting is key for a strong connection. It’s what links your wire rope to the turnbuckle.
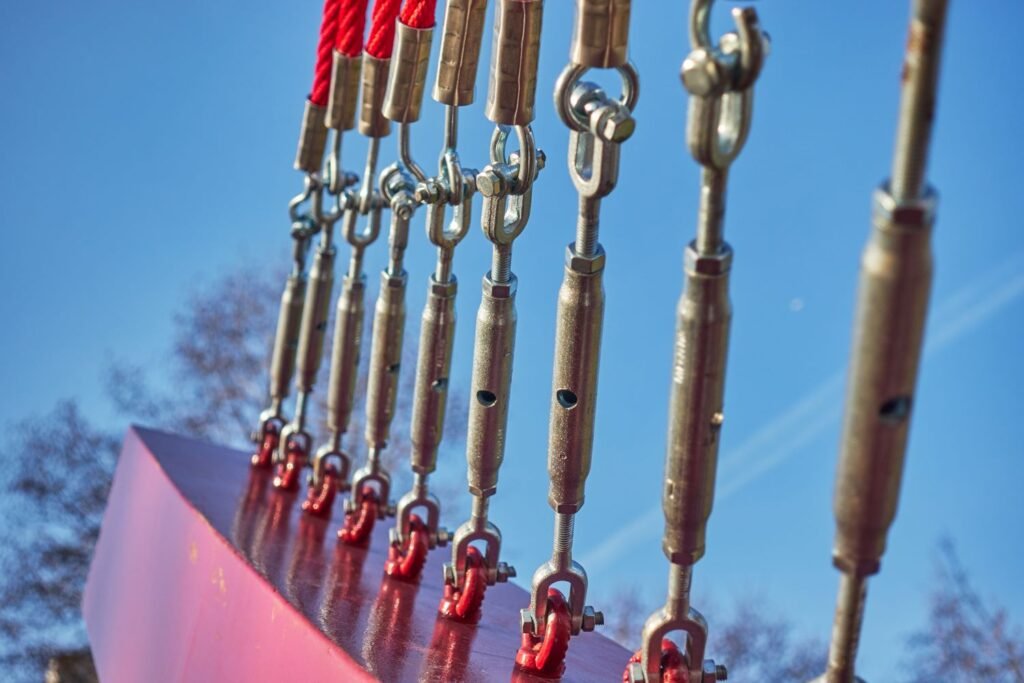
You need specific wire rope end fittings like thimbles with swage sleeves or wire rope clips, or various types of terminals to correctly attach a wire rope to a turnbuckle.
When I work with Aulone products, I always think about the specific application. Each end fitting has a purpose.
Let’s look at the most common types:
Thimbles and Swage Sleeves
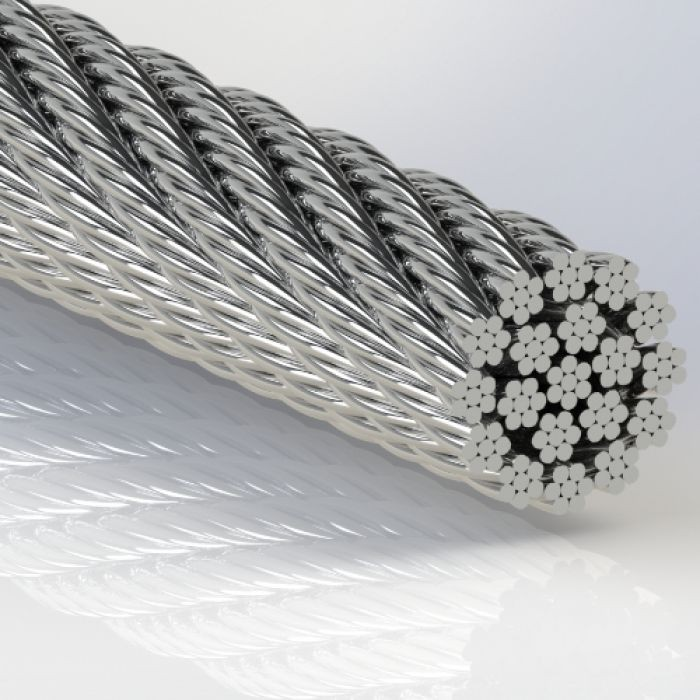
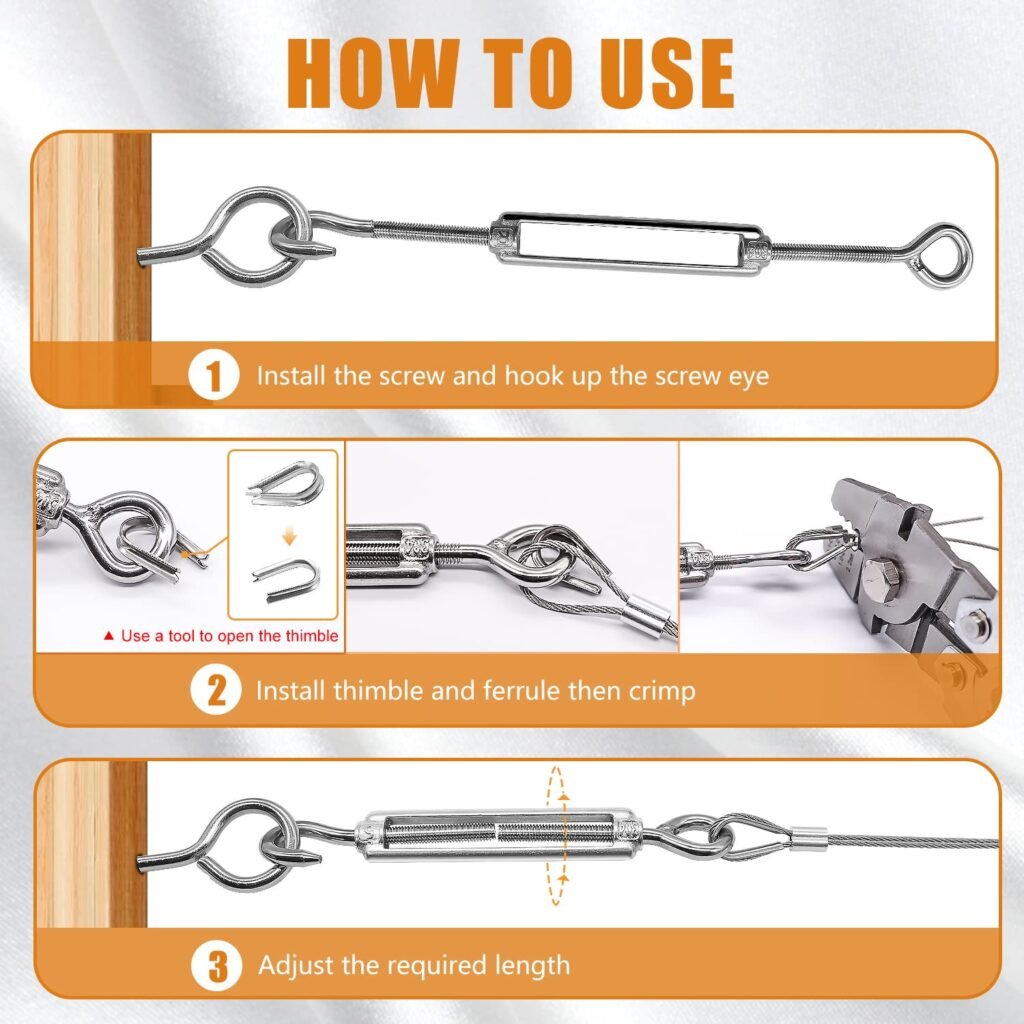
Thimbles are metal loops. You place them inside a wire rope eye. This eye protects the rope from wear and tear. It also helps the rope keep its shape. After you put the thimble in, you secure the eye. You do this with a swage sleeve. A swage sleeve is a metal tube. You press it onto the rope with a special tool. This creates a permanent loop.
This method gives a very strong and neat connection. It is often used for fixed structures. It provides high breaking load and tensile strength. This is crucial for products like our Aulone wire ropes, which are known for high quality.
Wire Rope Clips
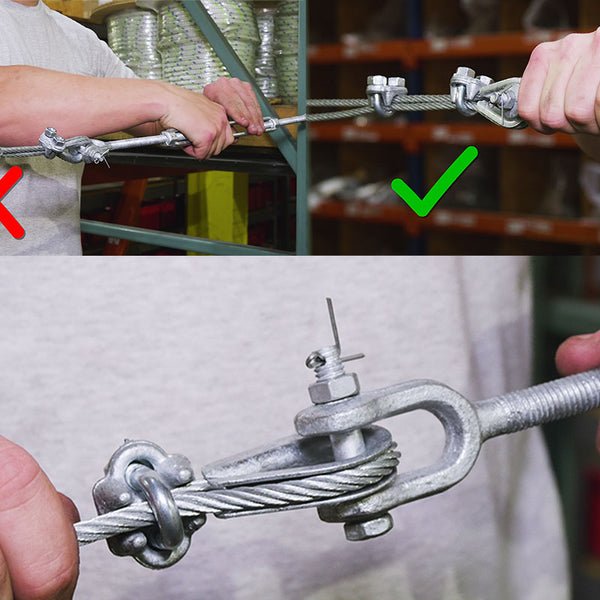
Wire rope clips are different. They offer a non-permanent way to form an eye. They are easy to use in the field. You put the thimble in the eye first. Then you use clips to hold the rope back onto itself. You need at least two or three clips for a secure connection. The “dead end” of the rope passes through the clips.
Always make sure the U-bolt part of the clip is on the dead end. The saddle part rests on the live (load-bearing) part of the rope. This is a common mistake people make. It can reduce the strength of the connection greatly. This method is good for temporary rigging or where adjustments might be needed.
Terminal Fittings
For some applications, you can use specialized terminal fittings. These include:
- Spliced Eyes: For fiber ropes, splicing creates a strong, neat loop. For wire ropes, this is a more traditional method but less common now for smaller applications due to swaging.
- Wedge Sockets: These are quick to install. A wedge holds the rope end in place. They are popular in mining and piling tools where speed is important.
- Spelter Sockets: You pour molten zinc around the rope end inside the socket. This creates a very strong, permanent connection. This is often used for very heavy-duty applications.
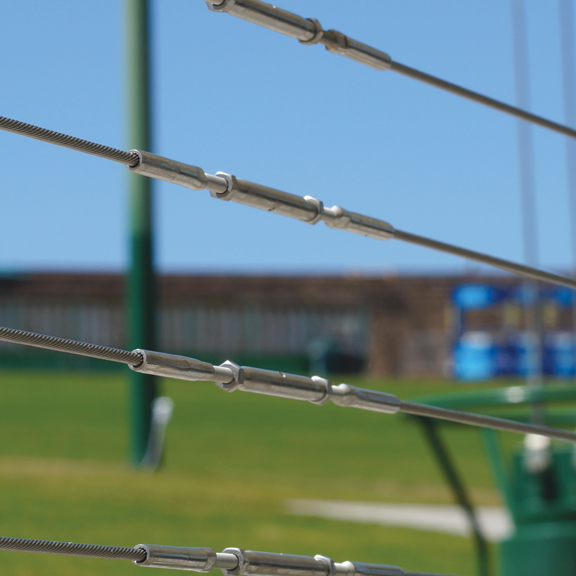
- Swage Terminals: These are metal fittings that are swaged directly onto the wire rope, creating a fixed end. They can have eyes, studs, or forks to connect to the turnbuckle. These options are highly compliant with standards like EN12385-4.
| End Fitting Type | Connection Type | Permanence | Common Uses | Notes |
|---|---|---|---|---|
| Thimble & Swage Sleeve | Loop | Permanent | Standing rigging, fixed lines | Very strong, neat finish |
| Wire Rope Clips | Loop | Non-permanent | Temporary rigging, field adjustments | Requires correct installation |
| Wedge Socket | Straight Line | Semi-permanent | Crane lines, mining applications | Quick installation, inspect regularly |
| Spelter Socket | Straight Line | Permanent | Heavy duty, structural applications | Requires specialized tools and skill |
| Swage Terminals | Various | Permanent | Architectural rigging, specialized tasks | High precision, factory installed often |
When choosing, consider the load, the environment, and if you need adjustability. Our Aulone team can guide you. We often work with purchasing managers who need high-quality and certified solutions. We can provide BV & CE, RMRS, DNV, ABS certificates easily.
What Tools Do You Need to Attach Wire Rope?
Having the right tools makes the job safe and efficient. Using wrong tools is unsafe.
To attach wire rope, you need cutting tools like bolt cutters or special wire rope cutters, and for swaging, a hydraulic swager or a hand swager, along with a tape measure.
Dive Deeper sections for h2: I always emphasize safety. Good tools are part of that. After all, wrong tools can damage the rope. Imagine trying to cut a thick wire rope with dull pliers. It won’t work well.
Here are the essential tools:
Cutting Tools
You need to cut the wire rope cleanly. This prevents fraying.
- Bolt Cutters: For smaller diameter ropes, bolt cutters can work. But they can deform the rope ends.
- Specialized Wire Rope Cutters: These are designed to cut wire rope without deforming it. They feature curved blades. For our high tensile strength ropes, these are essential. They ensure a clean cut. This clean cut makes it easier to install fittings. If the rope frays, it becomes hard to work with.
- Abrasive Cut-off Saws: For very large diameter ropes, these power tools are used. They provide a quick and clean cut. They can heat the rope up though.
Swaging Tools
If you choose swage sleeves or swage terminals, you need a swaging tool.
- Hand Swagers: For smaller diameters. These are manual tools. You squeeze handles to crimp the sleeve. They require considerable force.
- Hydraulic Swagers: For larger diameters and industrial use. These are powerful tools. They use hydraulic pressure to crimp the sleeve. They ensure a consistent and strong crimp. At Aulone, our production lines use advanced machinery. This guarantees high quality and precise swaging for our products. This includes specialized assemblies.
Measuring Tools
Accuracy is important.
- Tape Measure: This helps you get the right length of rope. It also helps you measure the tail length for clips.
- Calipers or Micrometers: For checking rope diameter and fitting dimensions. This helps ensure proper fit.
Other Useful Items
- Gloves: Wire ropes can have sharp strands. Always wear gloves. This protects your hands from cuts.
- Marker: For marking cut points or clip positions.
- Cleaning Cloths: To clean the rope and tools.
Having the right certified tools for high volume production is something we take seriously at our factory in China. We export to countries like Singapore, Indonesia, and Vietnam. Our clients expect precision.
How Do You Install Wire Rope Clips Correctly?
Opening paragraph for h2: Installing wire rope clips seems simple. But there is a right way and many wrong ways.
To install wire rope clips correctly, place the thimble in the loop, position the saddle on the live end, and tighten nuts, ensuring clips are spaced and torqued adequately, following the “never saddle a dead horse” rule.
I once saw a customer struggling with clips. They had put them on backwards. That small mistake weakens the connection significantly. I told them about the “never saddle a dead horse” rule. That helped them understand immediately.
Let’s break it down:
The “Never Saddle a Dead Horse” Rule
This rule helps ensure correct clip installation. The “saddle” part of the clip is the broad, flat section. The “U-bolt” is the curved part.
- Live End: This is the part of the rope carrying the load.
- Dead End: This is the short end of the rope you are looping back.
Always place the saddle part of the clip on the live end of the rope. The U-bolt goes over the dead end. If you put the U-bolt on the live end, it can crush the live wire strands. This reduces the rope’s strength. Maksim, one of our key clients in Russia, often asks about best practices. He values clear instructions like this one.
Installation Steps:
- Form the Eye: Loop the wire rope around a thimble. Make sure the thimble is properly seated.
- First Clip: Place the first clip close to the thimble. Position the saddle on the live end. The U-bolt should be on the dead end. Tighten the nuts.
- Second Clip: Place the second clip at the end of the dead end. This is near the end of the wire. Again, saddle on live, U-bolt on dead. Tighten the nuts.
- Additional Clips: If more clips are needed (usually for larger diameters or more critical applications), space them evenly between the first two clips. The number of clips depends on the rope diameter. Always check a proper chart for the recommended number and spacing. A general rule for common sizes is 3 clips.
- Torque: After installation, tighten all nuts. Use a torque wrench. Get the correct torque values from the clip manufacturer’s data.
- Re-torque: After initial loading, re-torque the nuts. Wire ropes can stretch slightly under load. This can loosen the clips. Re-tightening ensures the connection remains secure.
| Rope Diameter (inches) | Minimum Number of Clips | Torque (ft-lbs) |
|---|---|---|
| 1/4 | 2 | 15 |
| 3/8 | 2 | 30 |
| 1/2 | 3 | 45 |
| 5/8 | 3 | 65 |
| 3/4 | 4 | 95 |
| 1 | 5 | 130 |
(Note: Always refer to the specific clip manufacturer’s instructions and specifications for exact numbers and torque values. This table is a general guide.)
Our engineers always follow strict quality control during production. This ensures our wire rope products work perfectly with these standard fittings. This focus on compliance helps our products meet high standards for clients in UAE, Saudi Arabia, and Canada.
What Are Common Mistakes When Attaching Wire Rope to a Turnbuckle?
Even small mistakes can compromise safety. Knowing these pitfalls helps you avoid them.
Common mistakes when attaching wire rope include using too few clips, incorrect clip orientation (“saddling a dead horse”), over-torquing or under-torquing nuts, and not using a thimble in the loop.

Dive Deeper sections for h2: I have helped many customers avoid these errors. Maksim, for example, once had issues with his previous suppliers about certification. That led to quality control pain points. My goal is to ensure Aulone clients never face such problems due to improper installation.
Here are the most common mistakes I see:
1. Incorrect Number of Clips
People sometimes use too few clips to save time or money. This is dangerous. Using fewer clips than recommended lowers the breaking strength of the connection. Always consult a manufacturer’s chart. It will tell you the minimum number of clips. This ensures safety.
2. Improper Clip Orientation
As I mentioned before, “saddling a dead horse” is a frequent error. This means placing the U-bolt part of the clip on the live, load-bearing wire rope. This crushes the rope. It can reduce its strength by half. Always put the U-bolt on the dead end. The saddle must be on the live end.
3. Incorrect Torque
Nuts on wire rope clips need specific torque.
- Under-torquing: If the nuts are too loose, the clips can slip. This weakens the connection.
- Over-torquing: If the nuts are too tight, they can deform the wire rope. This damages the strands. It can also cause premature failure. Always use a torque wrench. Follow the manufacturer’s specified torque values.
4. Not Using a Thimble
Some people form an eye without a thimble. This allows the wire rope to flatten and fray. The thimble protects the rope inside the eye. It keeps the loop round. It distributes the load evenly. Our tough, galvanized wire ropes benefit greatly from thimbles. They help maintain high breaking load for longer.
5. Using Damaged or Incorrect Size Fittings
Always inspect all components before use. Check clips, thimbles, and turnbuckles for damage. Make sure they are the correct size for your wire rope. If a fitting is too large or too small, it won’t work properly. It might even fail. This is why our products come with precise specifications.
6. Not Re-torquing Clips
Wire rope can stretch a bit under its first load. This stretching can cause clips to loosen. It is crucial to re-torque the clips after the initial load. Some guidelines suggest re-torquing after 500 hours of operation or at regular inspection intervals.
7. Crossing Wires Inside Sockets
For spelter or wedge sockets, ensure the wire strands are not crossed. They should be well-arranged. This ensures the maximum surface area for the molten metal or wedge to grip. It provides optimal strength.
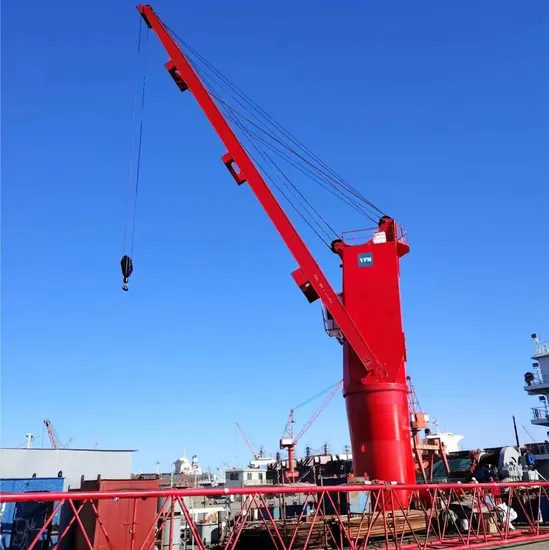
By avoiding these common errors, you can ensure a strong and safe connection. This helps maintain the high quality and performance of products like our specialized crane wire rope and marine wire rope, which are used in critical applications worldwide. Our goal at Aulone is to provide solutions that meet the highest standards.
Conclusion
Properly attaching wire rope to a turnbuckle is vital for safety and performance. Use the correct fittings, tools, and installation techniques for a strong, reliable connection.