Electromagnetic (magnetic flux leakage) testing is the only practical way to find broken wires and corrosion hidden inside a wire rope, while ultrasonic testing covers what the magnet cannot reach — socketed ends, pins and other massive steel components. Together with a disciplined visual routine, they give you a defensible picture of a rope’s real condition; on their own, neither replaces the other, and neither hands you a discard decision on a plate.
I am Andri, technical writer and crane rope specialist at Aulone, and I have spent more years than I care to count next to winch drums, sheave gauges and NDT reports. The single most common mistake I see is the opposite of what you would expect: it is not neglect, it is overconfidence in the eye. A good inspector can spot surface broken wires, diameter loss and distortion — but the damage that actually drops loads usually starts inside the rope, between the strands and in the core, where no lamp and no magnifier will ever reach. That is why non-destructive testing (NDT) exists. In this guide I will walk you through how magnetic flux and ultrasonic methods actually work, what each one finds and misses, which standards frame the results, and how to turn a test report into a sound keep-or-replace decision.
Why Visual Inspection Alone Stops Being Enough
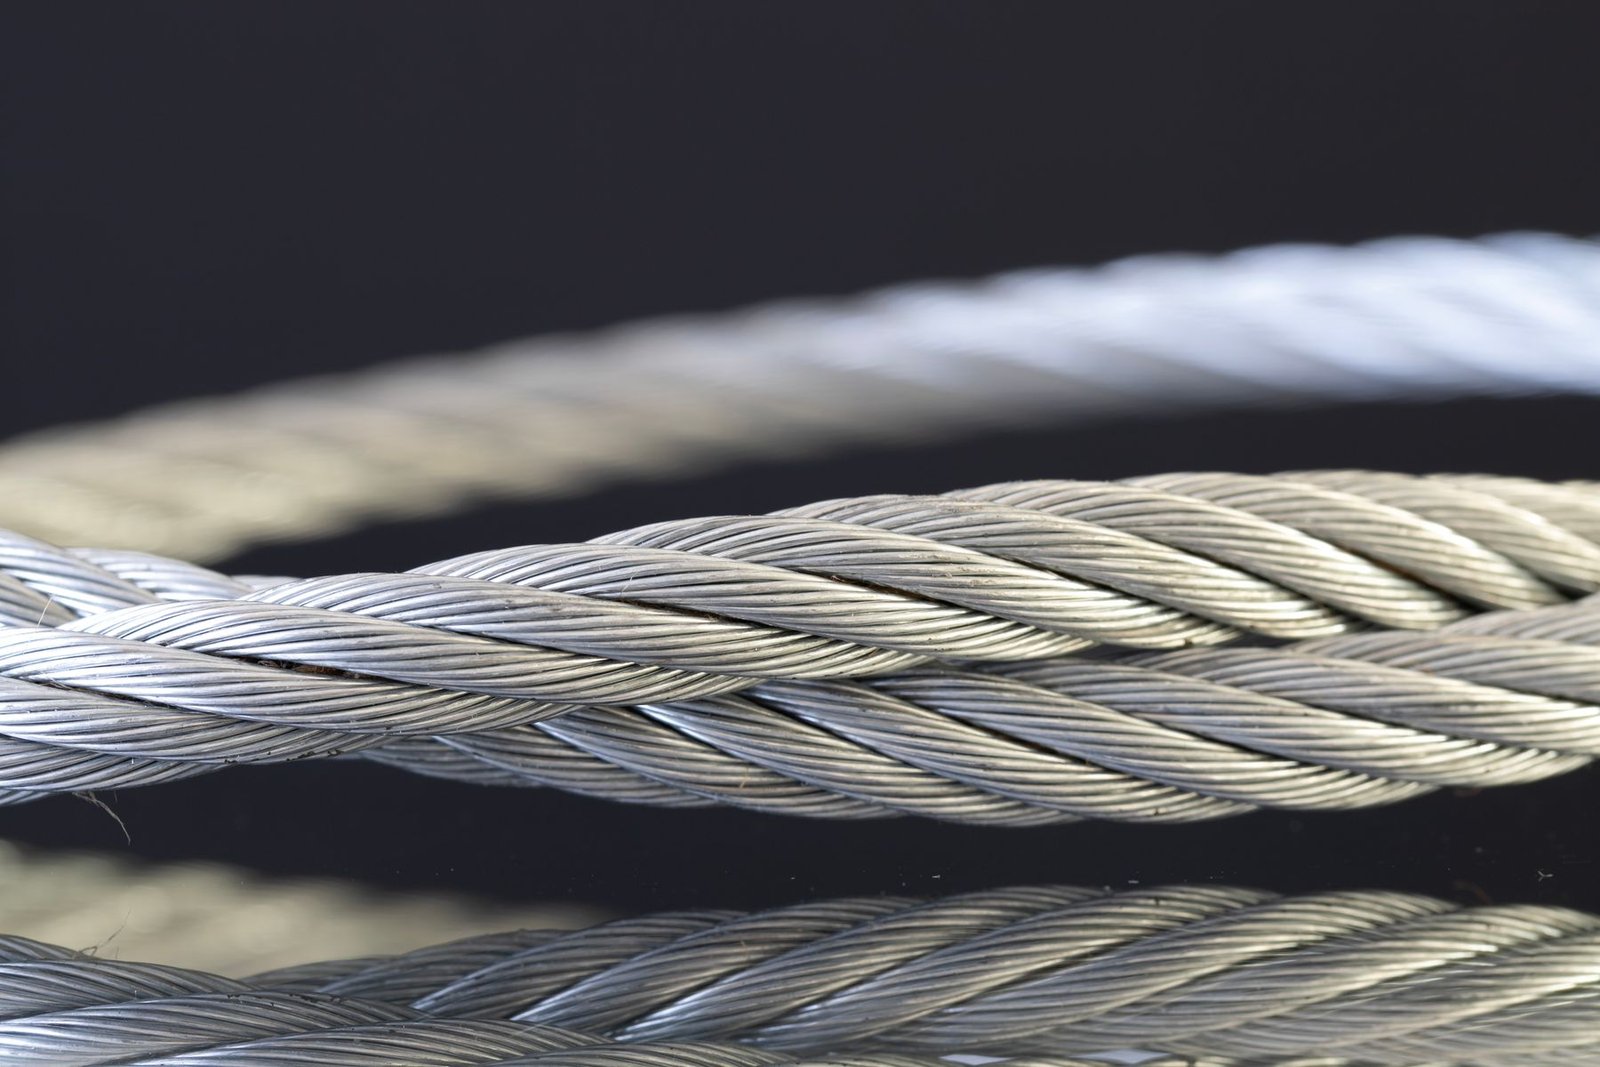
A running wire rope is a machine, not a length of steel. Hundreds of individual wires are twisted into strands, the strands are twisted around a core, and every bend over a sheave makes those wires move against each other. Fatigue, wear and corrosion all begin deep in that structure. A broken wire in the second or third layer of strands leaves the rope surface untouched. Corrosion pitting in an independent wire rope core (IWRC) can eat a significant share of the steel cross-section before the first trace of rust appears outside.
This is exactly why the rope constructions we supply for demanding hoisting work — compacted rotation-resistant ropes such as 35WXK7 (6×K36WS-EPIWRC class) for rotary drilling rigs and crawler cranes, or 18×K7 / 35×K7 for tower crane single-fall hook service — are designed with dense, compacted outer layers: they last longer, but they also hide their condition better. The smoother and tighter the surface, the less the eye can tell you about what is happening underneath.
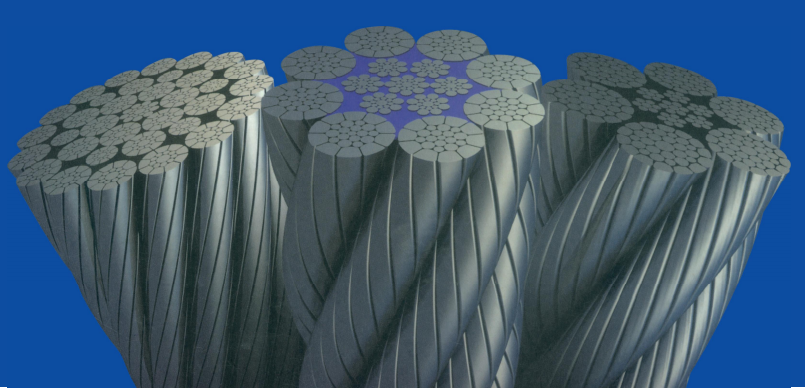
Standards acknowledge this openly. ISO 4309, the crane rope inspection and discard standard, is built around visual and manual examination, and it works well for surface damage — but an electromagnetic survey per ASTM E1571 is the recognised complement when internal deterioration is suspected, which in multi-layer drums and high-cycle duty is most of the time. If you want the full visual-side methodology, I have covered it separately in our guide to ISO 4309 inspection and discard criteria.
How Magnetic Flux Testing Works: LF and LMA
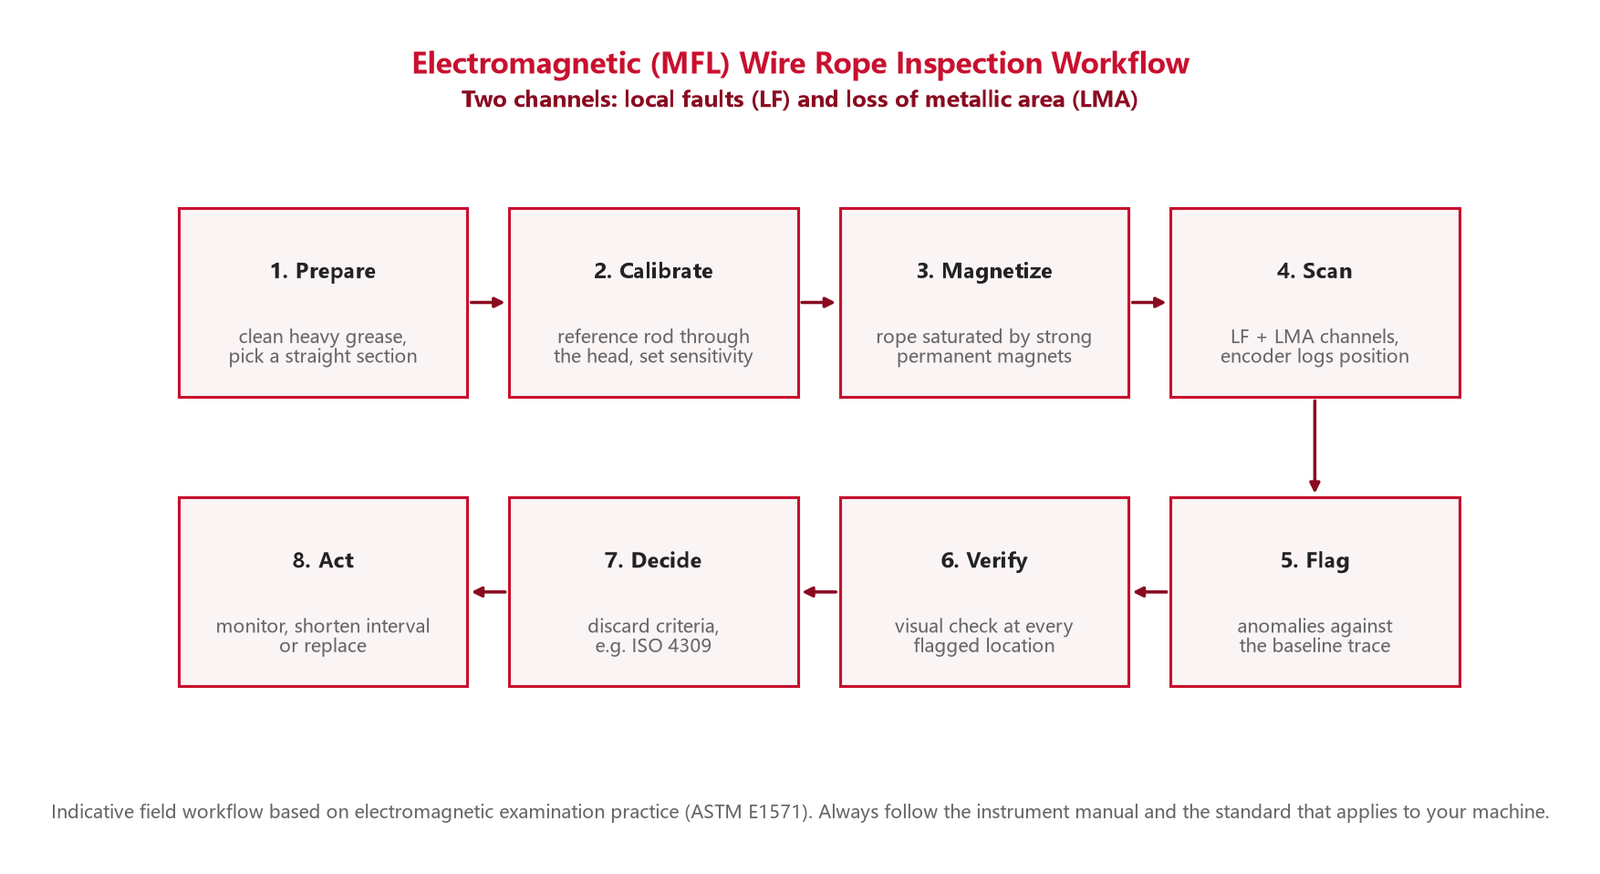
Electromagnetic testing of wire rope — usually called magnetic flux leakage (MFL) testing, or simply EM testing — is the workhorse of rope NDT worldwide, from mine hoists to port cranes. The principle is elegantly simple. A measuring head encircles the rope and a strong permanent magnet circuit saturates the steel. In a healthy, uniform section, the magnetic flux stays inside the rope. Where there is a discontinuity — a broken wire, a corrosion pit, missing steel — the flux leaks out of the rope, and sensors (Hall elements and/or induction coils) pick up that leakage. An encoder wheel logs exactly where along the rope each signal occurred.
The instrument gives you two independent channels of information, and understanding the difference is the key to reading any EM report:
The LF Channel — Local Faults
The local fault (LF) channel responds to short, sharp discontinuities: individual wire breaks, clusters of broken wires, localized corrosion pitting, even inter-strand nicking. LF is a qualitative channel — it tells you something sharp happened at a specific position, and the amplitude and shape of the spike give a trained analyst a good idea of whether it is a single outer wire break, an inner wire break, or a pit. LF is the channel that finds the buried broken wires your visual inspection never will, which is precisely its value: fatigue breaks in the inner wire layers are the classic precursor to sudden rope failure under load.
The LMA Channel — Loss of Metallic Area
The loss of metallic area (LMA) channel is quantitative. Because the flux carried by a saturated rope is directly proportional to the volume of steel inside the magnetising circuit, the instrument can be calibrated to report the percentage change in metallic cross-sectional area along the rope. Gradual, extended deterioration — general corrosion, uniform external and internal wear, strand-wire loss distributed over metres — shows up as a step or slope on the LMA trace, not as an LF spike. A typical modern instrument, properly calibrated, resolves LMA changes to roughly one to two percent, although the exact figure depends on the instrument, rope size and field conditions — treat any quoted accuracy as indicative and verify against the calibration certificate.
What a Test Looks Like in Practice
In the field the head is clamped around the rope and either the rope runs through it at working or slow speed, or the head is pulled along a stationary rope. Speeds are typically a few metres per second at most — this is a survey, not a race. The instrument records both channels continuously against position, and the analyst then flags anomalies and reconciles them against a visual walk-down of the same locations. One habit from my own experience: always have the analyst compare two consecutive runs. A genuine defect repeats; a stray signal from a nearby steel member or an uneven lubricant film often does not.
Where Ultrasonic Testing Fits
If magnetic methods are the general practitioner of rope NDT, ultrasonic testing (UT) is the specialist you call for specific organs. UT sends high-frequency sound pulses into a component and reads the reflections from internal interfaces. It is the right tool where MFL physically cannot work or is not sensitive enough:
- Rope terminations. Resin and babbitt sockets, pressed ferrules and spliced eyes cannot pass through a magnetising head, and the wire breakage that matters at a termination — broken wires at the bearing point inside the basket — is invisible from outside. UT of the socketed end can assess the wires where they enter the cone, and is widely used on mine hoist and elevator ropes for exactly this reason.
- Massive hardware. Sheave shafts, pins, hooks and drum shafts are standard UT territory: crack detection in high-stressed sections that carry no rope at all but carry the same load.
- Selected rope-body questions. With skilled operators, UT has been applied to rope bodies to estimate remaining section or to examine specific suspect areas, but the strand geometry scatters sound heavily, coupling is fussy, and coverage is slow. In my experience UT of the rope body remains a supplementary technique, not a substitute for a full-length EM survey.
One honest caveat applies to both methods: UT depends heavily on operator skill, and MFL depends heavily on instrument calibration and correct head size for the rope diameter. Anyone quoting NDT results without telling you their calibration procedure is quoting noise.
The Standards That Frame the Results
NDT numbers are meaningless without a framework, and the framework is a small set of standards worth knowing by name — at least well enough to ask your test provider which ones they work to. The table below summarises the documents most often referenced; always verify applicability against the standard text and your machine’s regulatory requirements.
| Standard | Scope | What it means for you |
|---|---|---|
| ASTM E1571 | Standard practice for electromagnetic examination of ferromagnetic steel wire rope | The procedural backbone for MFL testing: magnetisation, equipment, calibration, data recording and reporting |
| ISO 4309 | Cranes — wire ropes — care, maintenance, inspection and discard | The discard criteria (mostly visual/manual) that EM survey findings are ultimately judged against on crane applications |
| EN 12927-6 | Safety requirements for passenger ropeways — discard criteria | The most explicit numeric treatment of EM results: maximum permissible loss of metallic area and wire breaks over defined reference lengths |
| Regional / industry codes | Mining, elevator and offshore codes referencing EM inspection | Often set mandatory test intervals for specific machines — check the code that governs your installation |
The EN 12927-6 approach is worth a moment, because it shows where the industry is heading. Rather than a single “ropes fail at X broken wires” number, it limits LMA as a function of reference length — a larger loss is tolerable over a long reference length (on the order of hundreds of rope diameters) than over a short one, where a few percent of missing steel concentrated locally is far more dangerous. Ask your test provider to report against reference lengths, not just raw traces.
What Each Method Finds — and What It Misses
Put the methods side by side and the division of labour becomes clear. No single technique covers the whole deterioration map, which is why a serious rope management programme layers them.
| Deterioration mode | Visual + calipers | EM / MFL (LF) | EM / MFL (LMA) | Ultrasonic (UT) |
|---|---|---|---|---|
| Outer wire breaks | Yes — primary tool | Yes — confirms and counts | Indirect | Impractical |
| Inner / core wire breaks | No | Yes — key strength | Indirect | Limited |
| Uniform external wear | Yes — diameter check | Weak | Yes | Limited |
| General internal corrosion | No | Pitting only | Yes — key strength | Limited |
| Localised corrosion pitting | Only if exposed | Yes | Partly | Limited |
| Distortion (kink, birdcage, crushing) | Yes | Secondary signal | Secondary signal | No |
| Broken wires inside terminations | No | No — head cannot reach | No | Yes — primary tool |
| Cracks in pins, shafts, hooks | No | No | No | Yes |
What NDT Cannot Do — The Honest Limitations
I would rather set your expectations now than argue about a report later. Four limitations matter most.
First, NDT does not make the discard decision. The instrument reports signals; a qualified person compares them against the applicable discard criteria and the rope’s history. EN-style LMA limits and ISO 4309 break counts are judgement frameworks, not arithmetic the box performs for you.
Second, EM testing is blind at the very ends. The magnetising head needs a straight, accessible length of rope, so terminations and the last few rope diameters at each end must be covered visually or by UT. Ironically, the high-stress bearing point inside a socket is where many ropes actually die.
Third, it works on ferromagnetic steel only. Austenitic stainless steel ropes are essentially invisible to MFL. Galvanising and lubrication are fine — the magnet does not care — but stainless is out.
Fourth, results are operator- and calibration-dependent. Wrong head size, worn magnets, no calibration rod, unrecorded rope history — any of these degrade the survey from evidence to guesswork. Good providers welcome the question “show me your calibration”; bad ones bristle at it.
From Test Report to Decision: A Practical Sequence
When the report lands, this is the sequence I recommend — it is unglamorous but it keeps decisions defensible:
- Reconcile LF flags with the visual record. Every flagged position should be inspected by eye and probed. An inner-break signal confirmed by a slightly protruding wire becomes a fact, not an inference.
- Read LMA against reference lengths and against the baseline. If this is your second or third survey of the same rope, the delta between surveys is more informative than the absolute value — it tells you the deterioration rate.
- Apply the discard criteria of your governing standard. For crane ropes that is typically ISO 4309, with the EM survey filling the internal picture visual inspection cannot provide.
- Record everything in the rope register. Test traces, calibration records, positions, decisions. When an incident investigator (or a customer’s auditor) asks why the rope was still in service, the register is your answer.
And when the decision goes the other way — the rope comes off — the failures I have reviewed almost always trace back to a pattern the earlier data already hinted at. We have documented a number of these in our wire rope failure case studies, and the underlying mechanisms in why wire ropes fail and how to prevent it.
Building a Sensible Inspection Programme
Frequency is the question every plant asks and the honest answer is: it depends on duty, and your applicable code may mandate it. What I can give you is the structure that works. Daily and weekly, the operator’s eyes: visual walk-downs, diameter spot checks, attention to sheave and drum areas. At the formal periodic inspection, the ISO 4309-type systematic visual examination. And alongside those, EM testing on a schedule set by duty class and history — for a high-cycle mine hoist or a dredger grabbing abrasive material, that means regular instrumented surveys; for a lightly used auxiliary hoist, a baseline survey plus targeted re-tests may be entirely reasonable. Two anchors from experience: test after any incident that could have overloaded or damaged the rope, and shorten intervals as the rope ages — deterioration accelerates, it does not run linearly.
Lubrication deserves a mention in the same breath, because it directly affects both rope life and test quality: heavy, hardened grease blankets the surface signals EM relies on and hides early wear, while a correctly maintained lubricant film keeps corrosion — the LMA channel’s main target — out of the rope in the first place. Our wire rope lubrication guide covers how to get this right. Elongation behaviour is the other cheap condition indicator worth tracking between tests; the pattern is explained in our guide to wire rope elongation and stretch.

How Aulone Supports Rope Life Beyond the Test
Testing tells you where a rope stands; rope quality decides how fast it moves. Aulone is a professional manufacturer and supplier of steel wire ropes, wire rope slings, synthetic ropes and rigging hardware for lifting, marine, mining, construction and industrial applications. With over 20 years in the industry and an annual capacity of around 200,000 tons, we manufacture to EN 12385-4 under an ISO 9001 quality system, with type approvals including BV, ABS, DNV and RMRS, and CE marking where applicable. We keep popular constructions in stock for fast delivery, supply custom assemblies with terminations fitted and proof tested, and welcome third-party inspection and testing before shipment. If you are planning a rope replacement and want a second opinion on construction selection for your duty cycle, write to me at info@wireropes.net — a photograph of the drum and your duty summary is usually enough to start a useful conversation.
Frequently Asked Questions
Can electromagnetic testing really find broken wires inside the rope?
Yes — that is its core purpose. The LF channel responds to flux leakage at any discontinuity, outer or inner. Internal fatigue breaks are precisely the defects visual inspection cannot see and EM testing finds best. The analyst cannot always tell the exact wire layer from the signal alone, which is why flagged positions are verified visually where possible.
Does magnetic flux testing damage the rope?
No. The magnetising field is static and does not heat, magnetise-permanently to any harmful degree, or alter the rope’s mechanical properties. The head clamps around the rope and the rope passes through it — that is the entire interaction. It is genuinely non-destructive.
How accurate is the LMA measurement?
Modern instruments, correctly calibrated on the rope being tested, typically resolve loss of metallic area to around one to two percent, but treat any accuracy claim as indicative: it depends on the instrument, rope construction and diameter, and field conditions. Insist on seeing the calibration record, ideally taken with a reference rod on your actual rope.
Can NDT replace visual inspection?
No. Visual inspection remains the primary method for surface broken wires, diameter loss, distortion and corrosion, and it is the only practical check at terminations. EM testing adds the internal picture; the two together, cross-checked, are what standards and good practice expect.
How often should a rope be NDT tested?
It depends on machine type, duty class and regulatory requirements — some mining and ropeway codes mandate intervals, while general crane practice sets them by risk. Practical anchors: establish a baseline survey on installation, re-test at intervals shortened as the rope ages or as survey deltas grow, and always test after any overload, snagging or other incident.
Does it work on galvanized or stainless steel ropes?
Galvanised ropes test normally — the zinc layer does not affect the magnetisation of the steel wires. Austenitic stainless steel ropes, however, are essentially non-magnetic and cannot be assessed by MFL; visual inspection and, in limited cases, UT are the remaining options.
Can the test cover the rope on the drum or at the socket?
No. The head needs a straight, accessible rope section, so multi-layer drum wraps cannot be scanned in place — where access allows, the rope is surveyed as it is payed off the drum during re-reeving. Terminations and the end regions are covered visually or by ultrasonic testing of the socketed end.
What should I look for when hiring an NDT provider?
Four things: written procedures referencing ASTM E1571 or the equivalent national standard; calibration practice on your rope diameter; reporting that gives LF and LMA against position and reference lengths, not just raw traces; and analysts willing to walk the rope with you. A provider who resists any of these is telling you something.